Death by Chocolate Truffle Cookies

Death by Chocolate Truffle Cookies

Death by Chocolate Truffle Cookies Cover

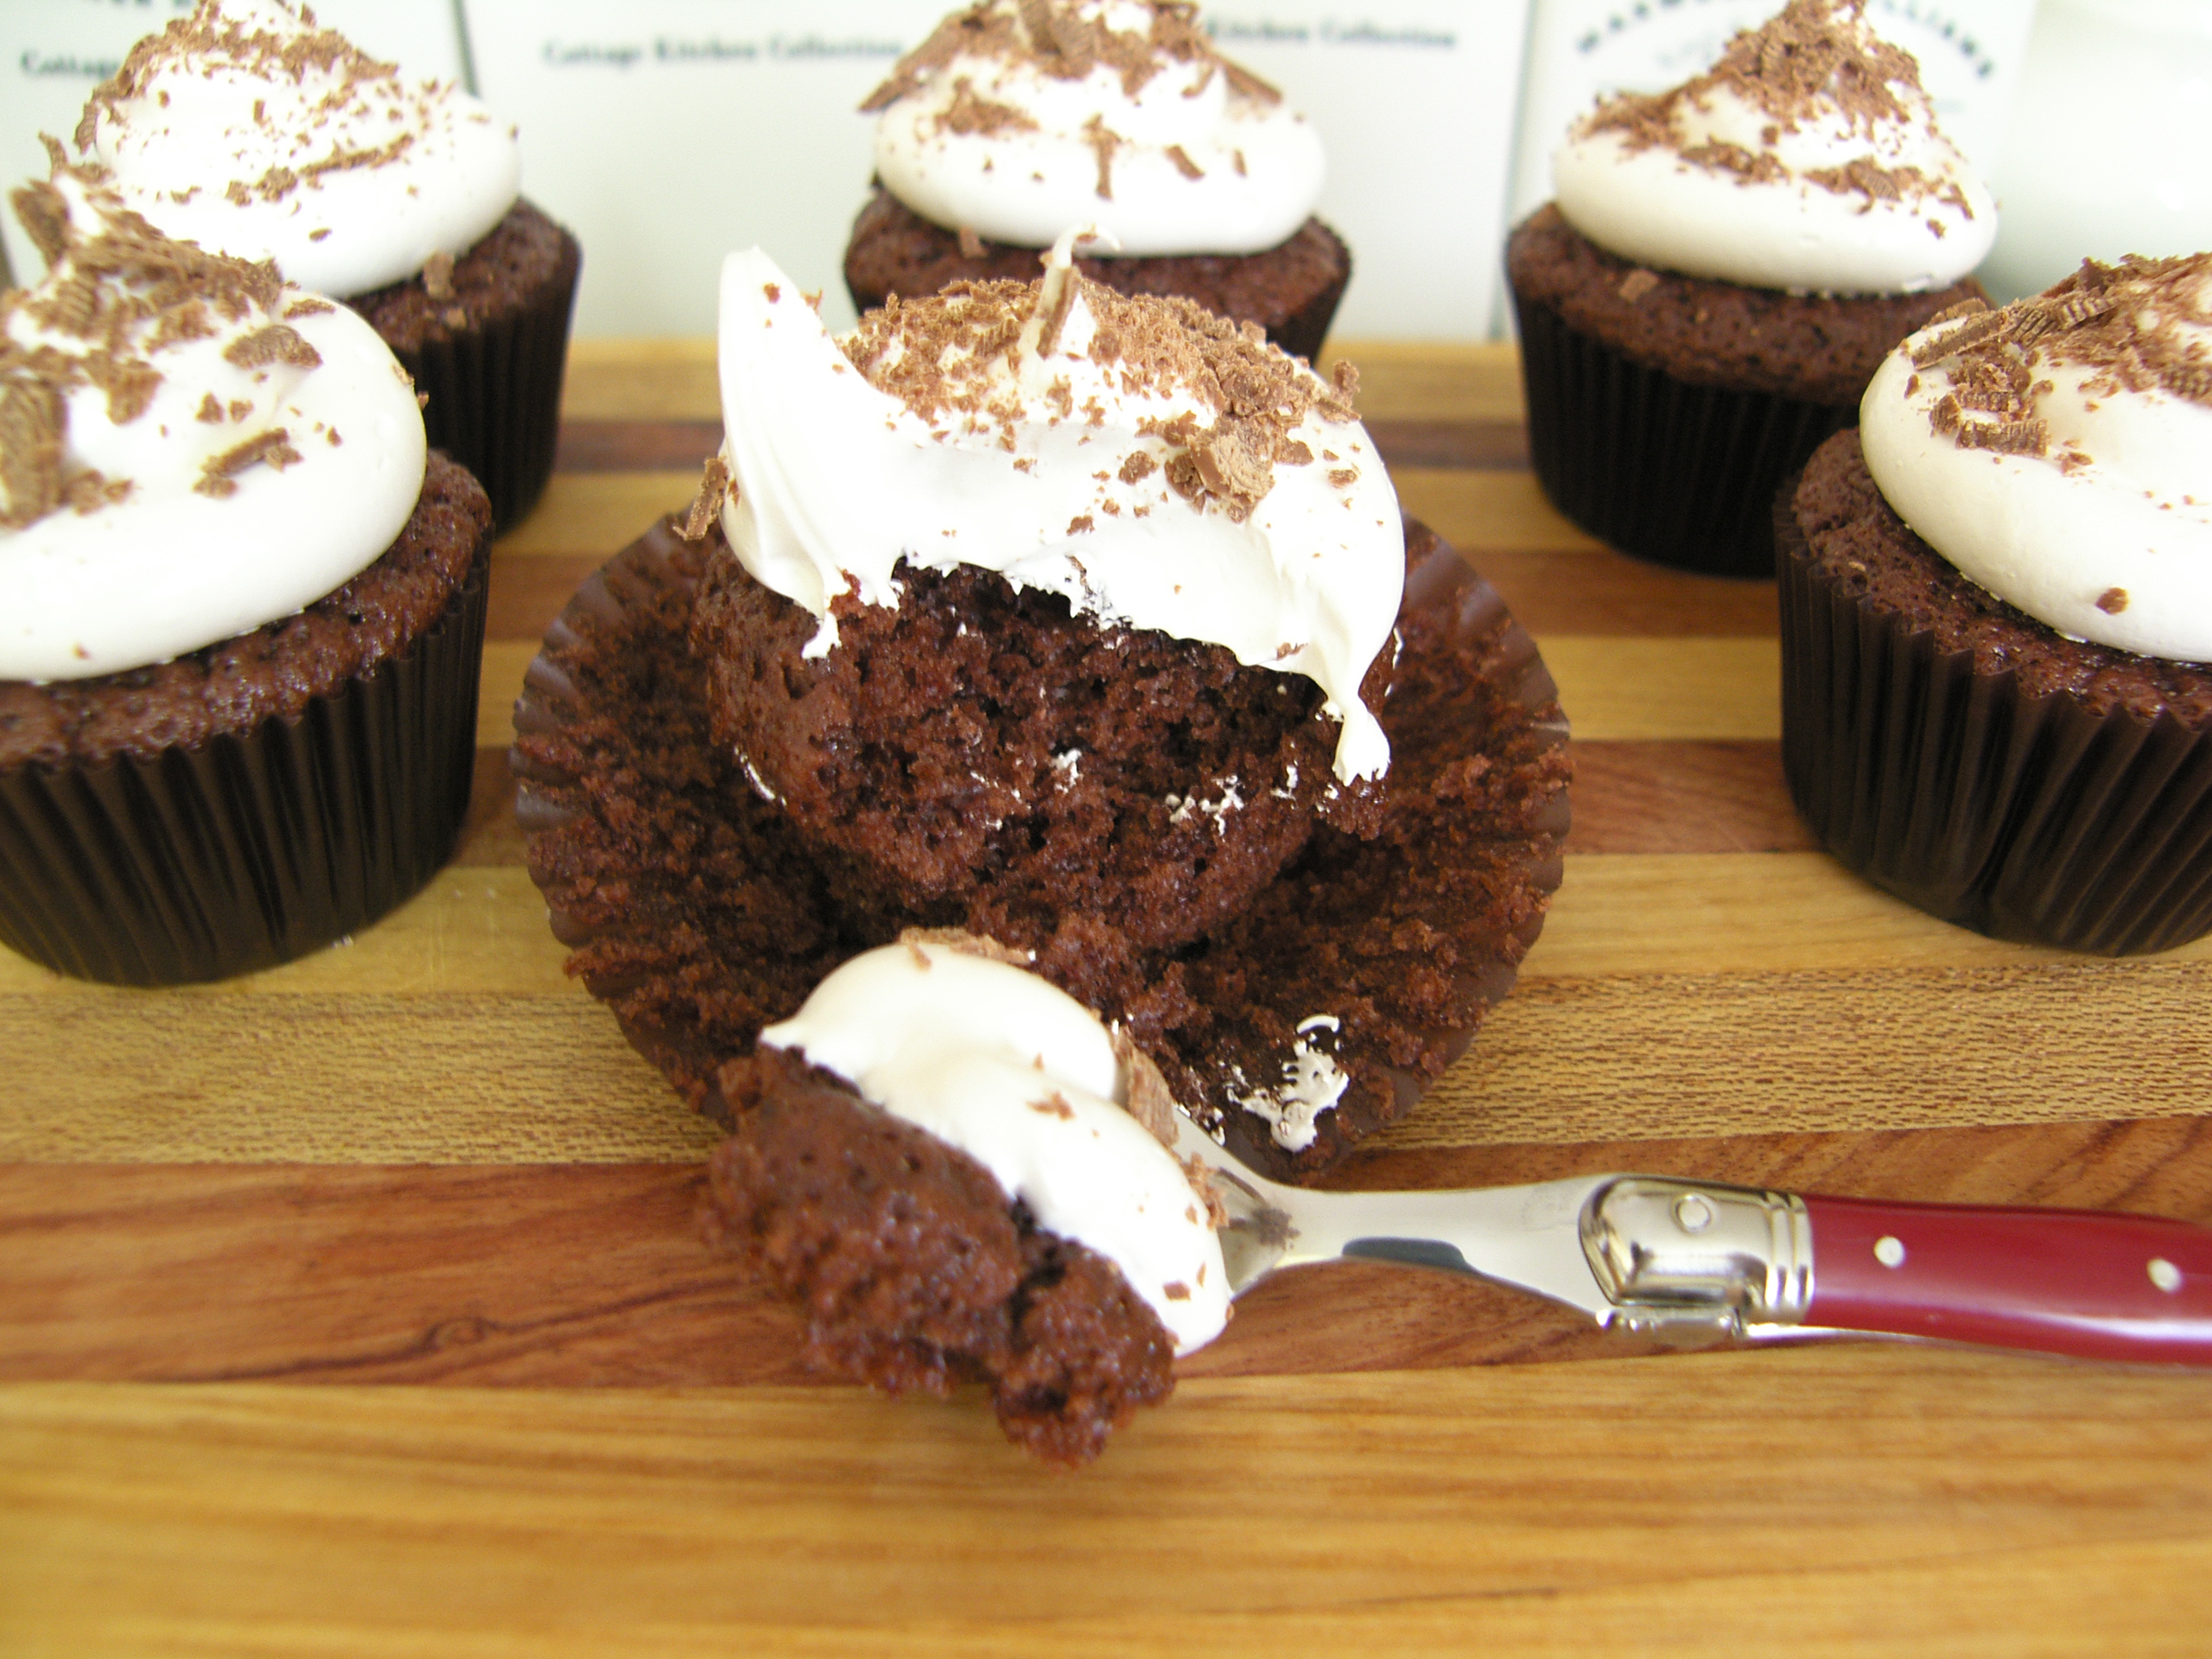
These cookies are a chocolate lovers dream. They are soft, chewy and intensely chocolatey!

They are so easy to make and will definitely satisfy any chocolate craving. I love dunking them in a hot cup of cappuccino and biting into all that chocolate goodness. They really do taste just like chocolate truffles! Very easy to make, but they will get your hands a bit messy (you’ll end up with sticky palms and fingers, but it’s so worth it!).

SAMSUNG DIGITAL CAMERA

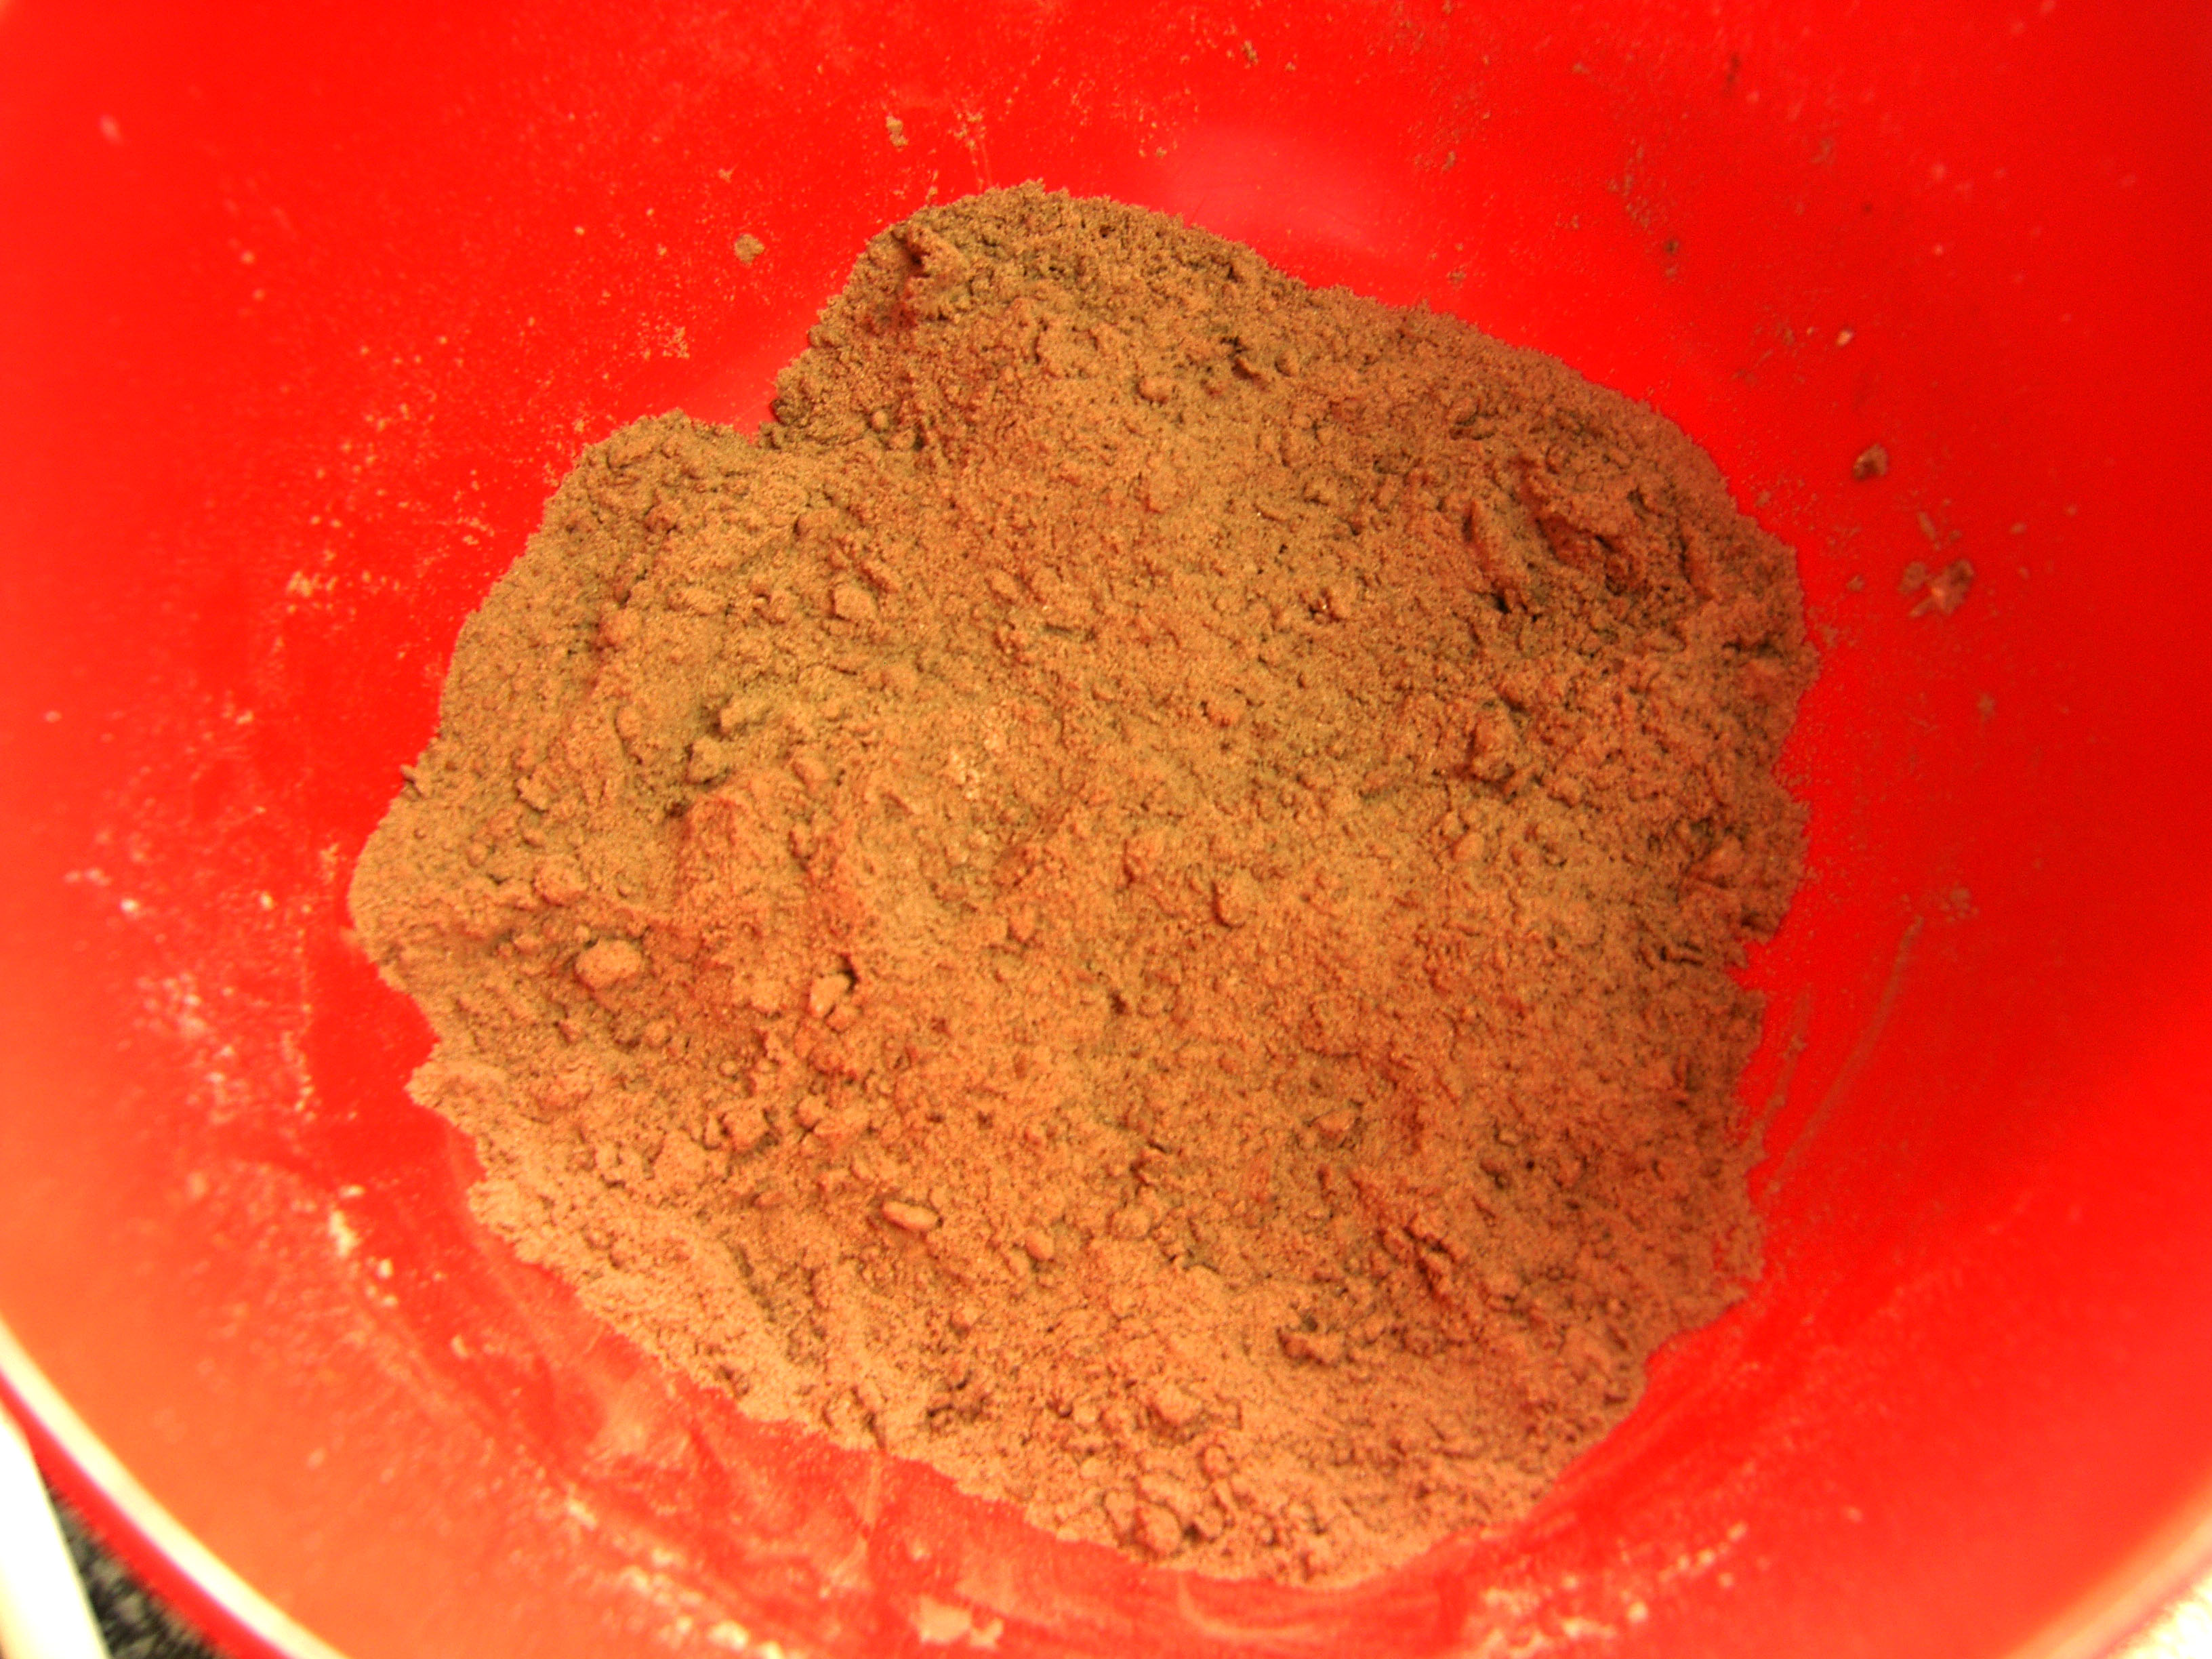
Sifted flour, cocoa, baking powder, caster sugar and bits of salted butter, ready to be mixed together.

SAMSUNG DIGITAL CAMERA

Once you’ve mixed it all together with your fingertips, it should look a bit like sand.

SAMSUNG DIGITAL CAMERA

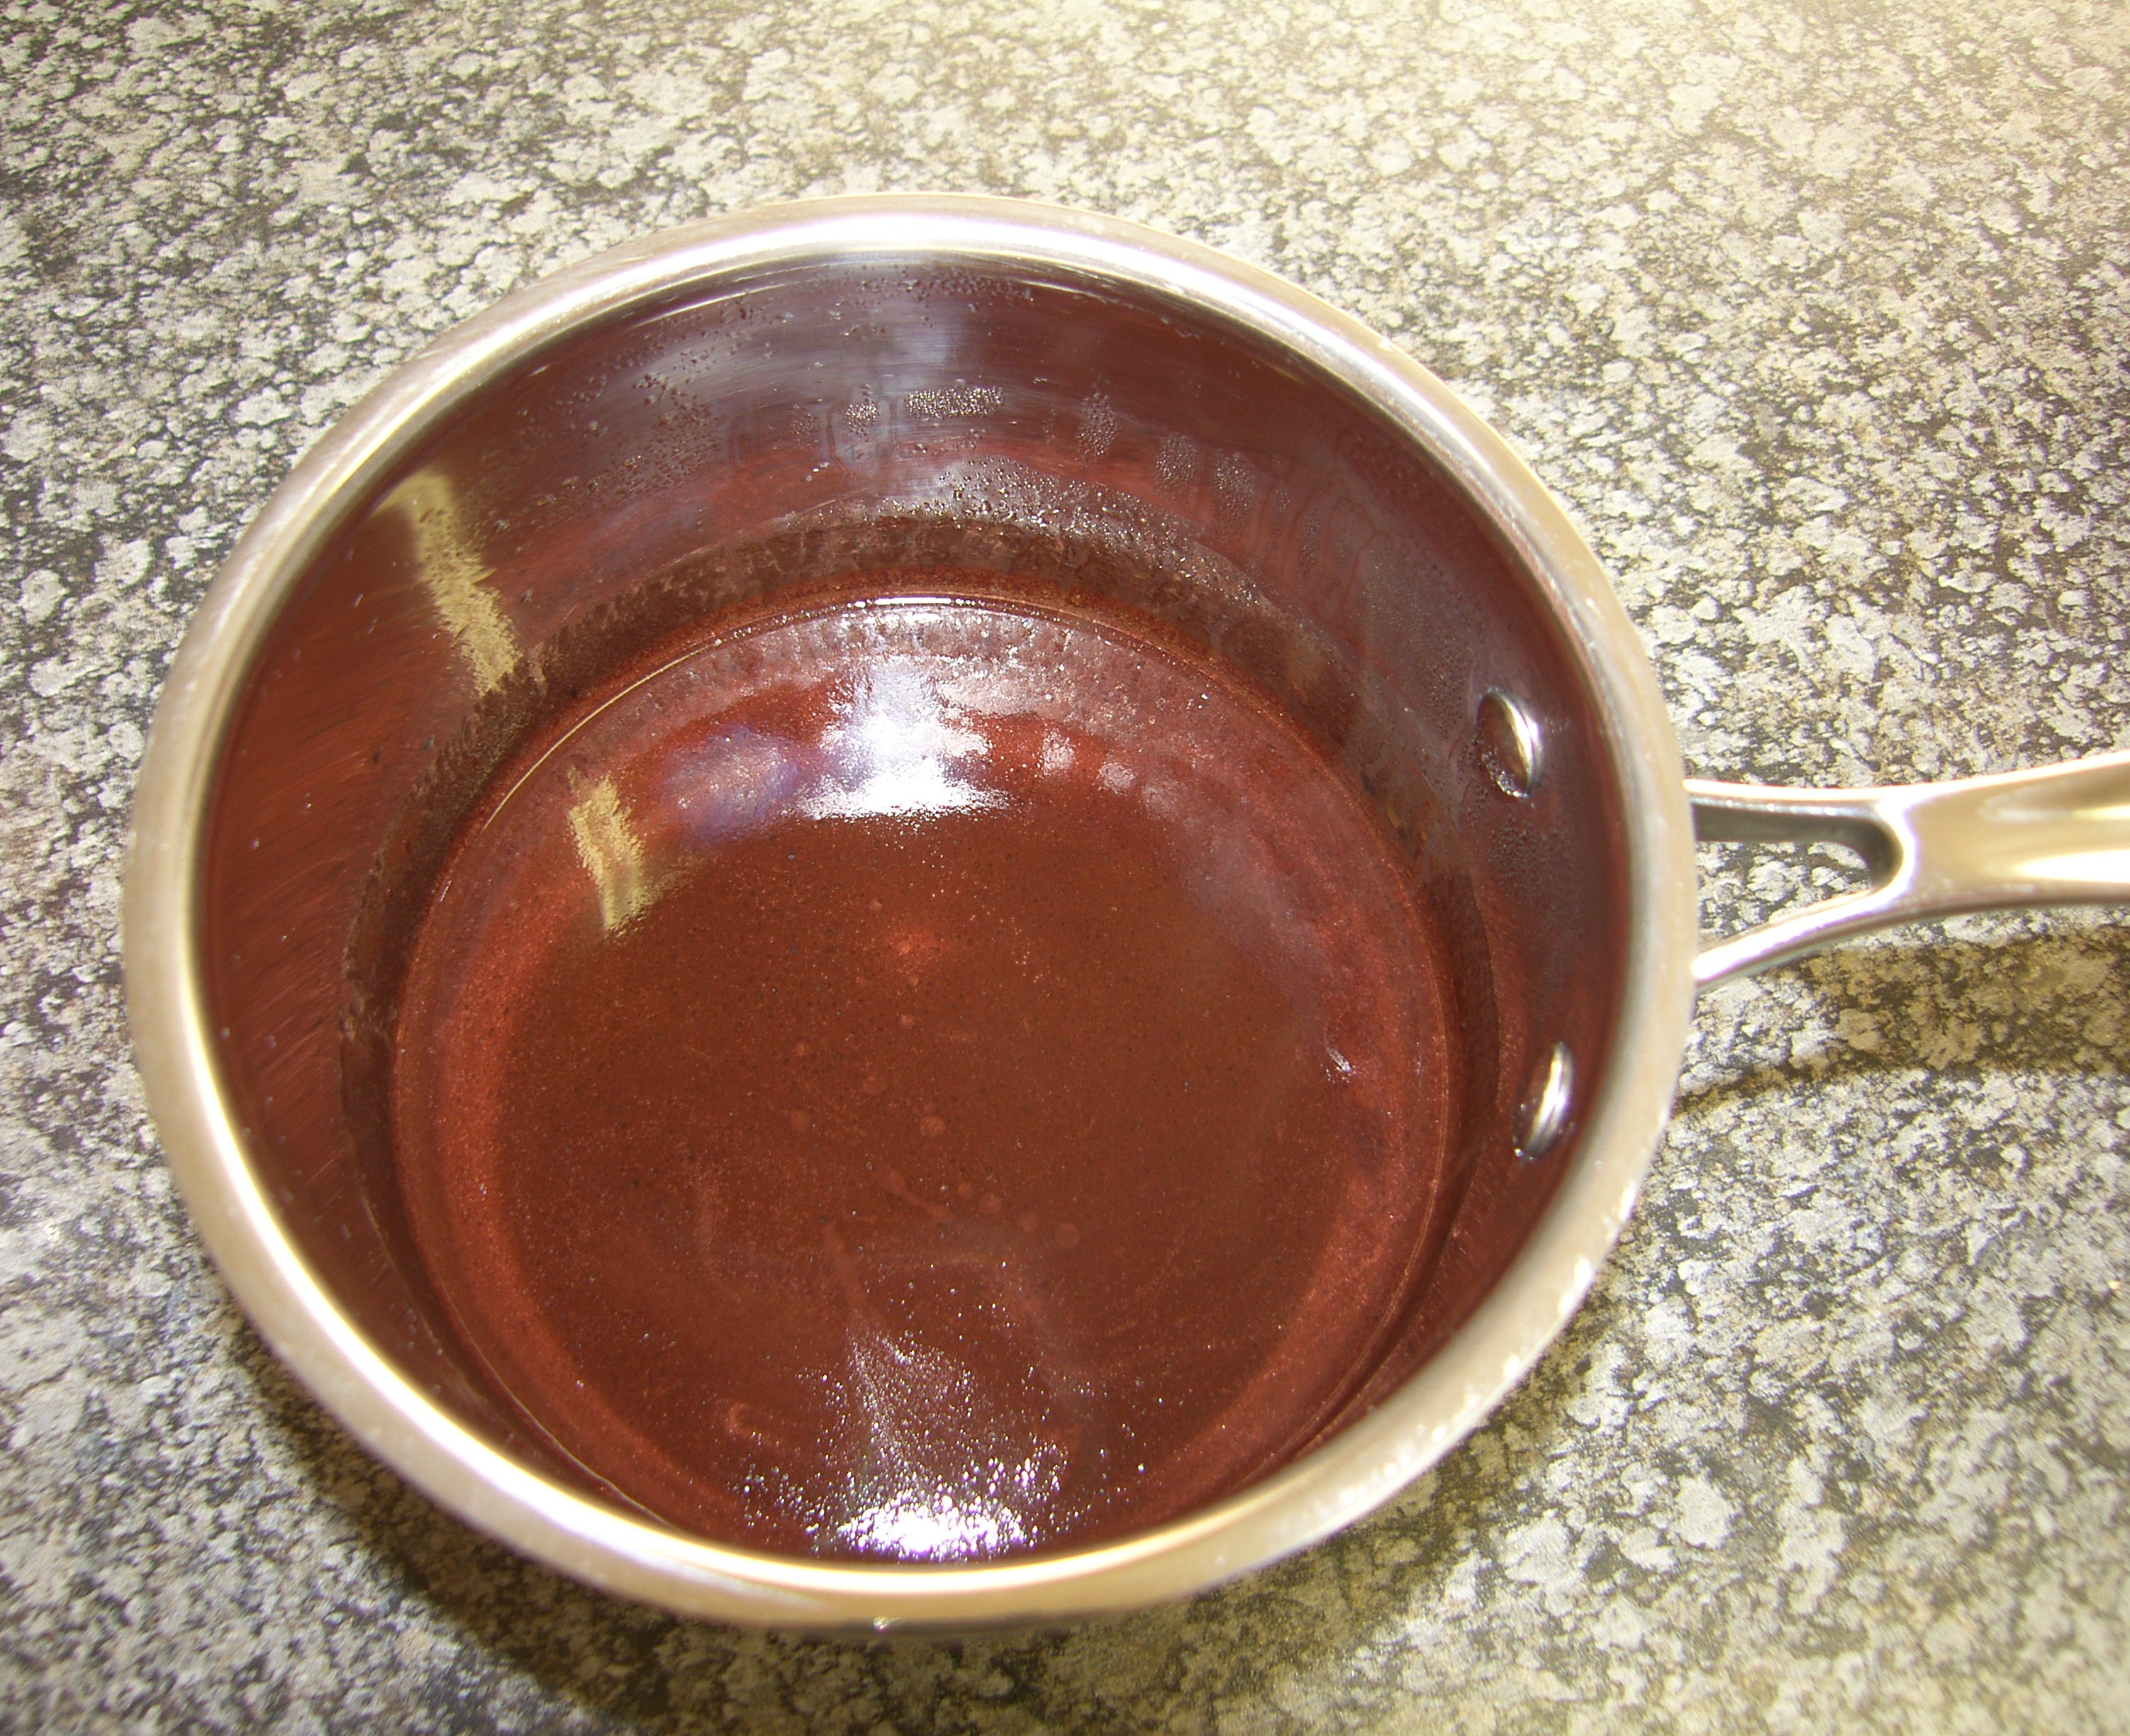
When you mix in the egg and hazelnut liqueur, it will turn into a very sticky dough (that’s why I said your hands will get really messy!). Pop it in the fridge to chill and it will be ready to roll (literally).

SAMSUNG DIGITAL CAMERA

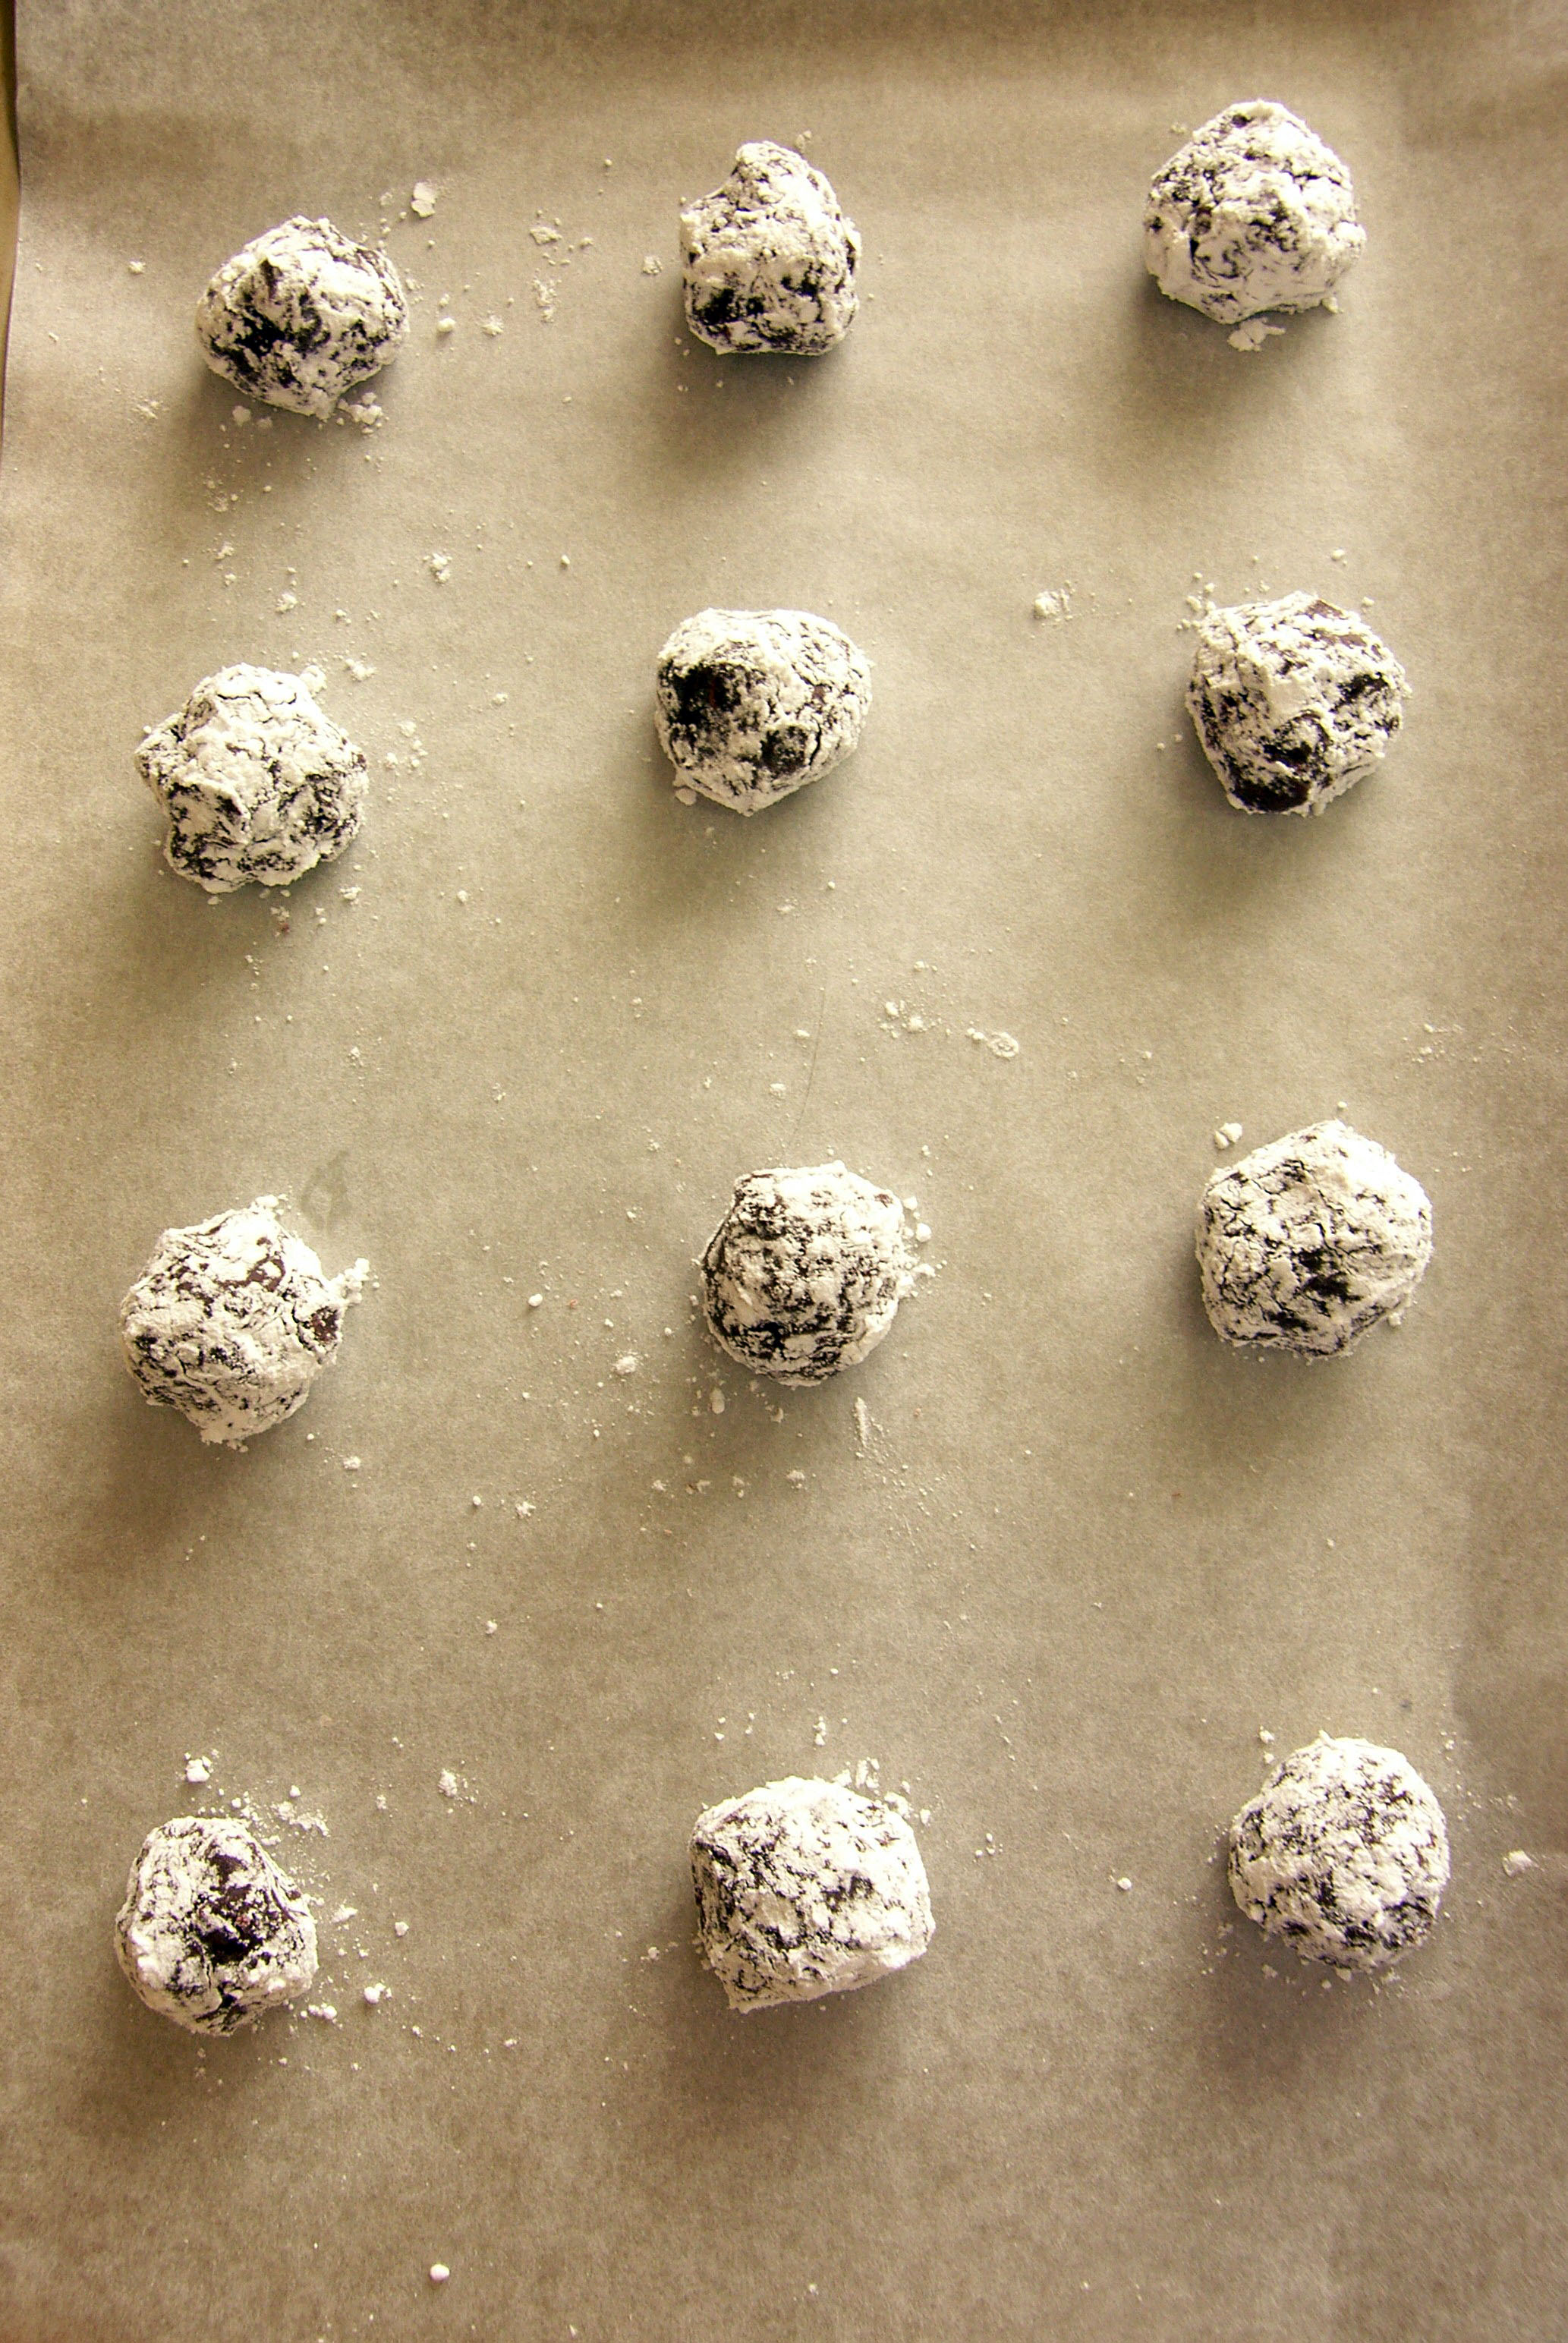
Once you’ve rolled the dough into 3cm diameter balls, coat them in icing sugar and place them on a lined baking tray.

SAMSUNG DIGITAL CAMERA

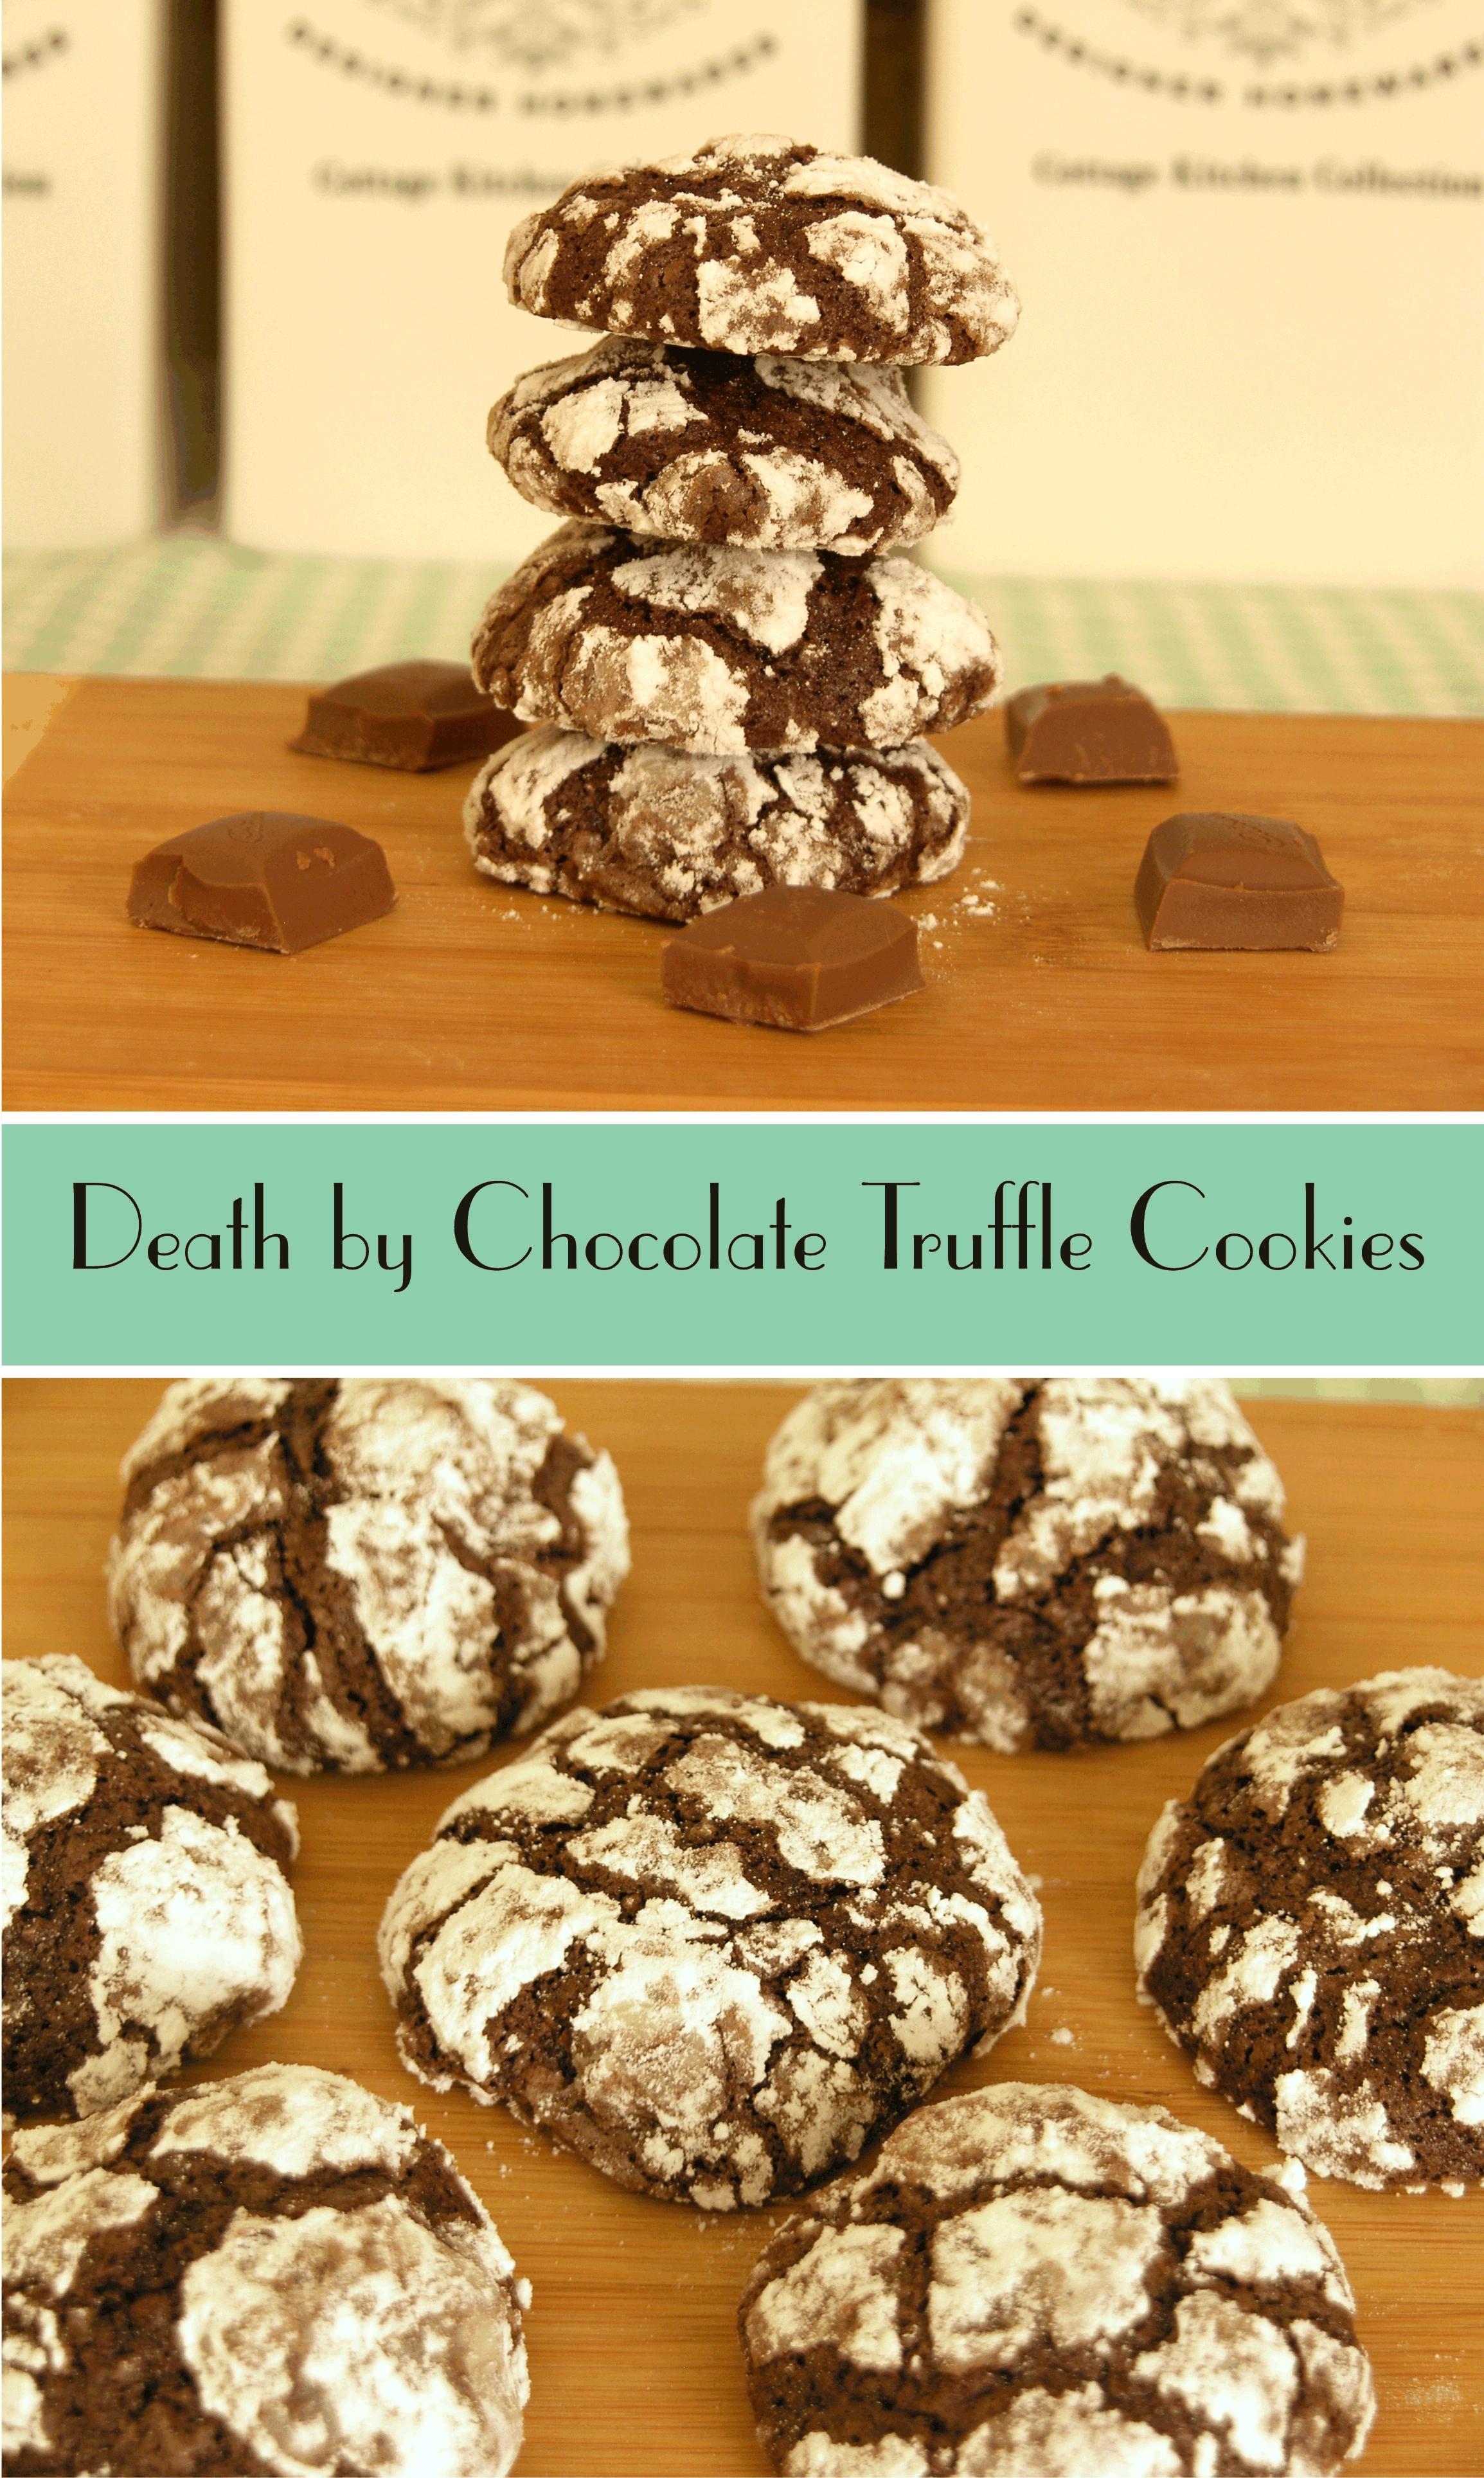
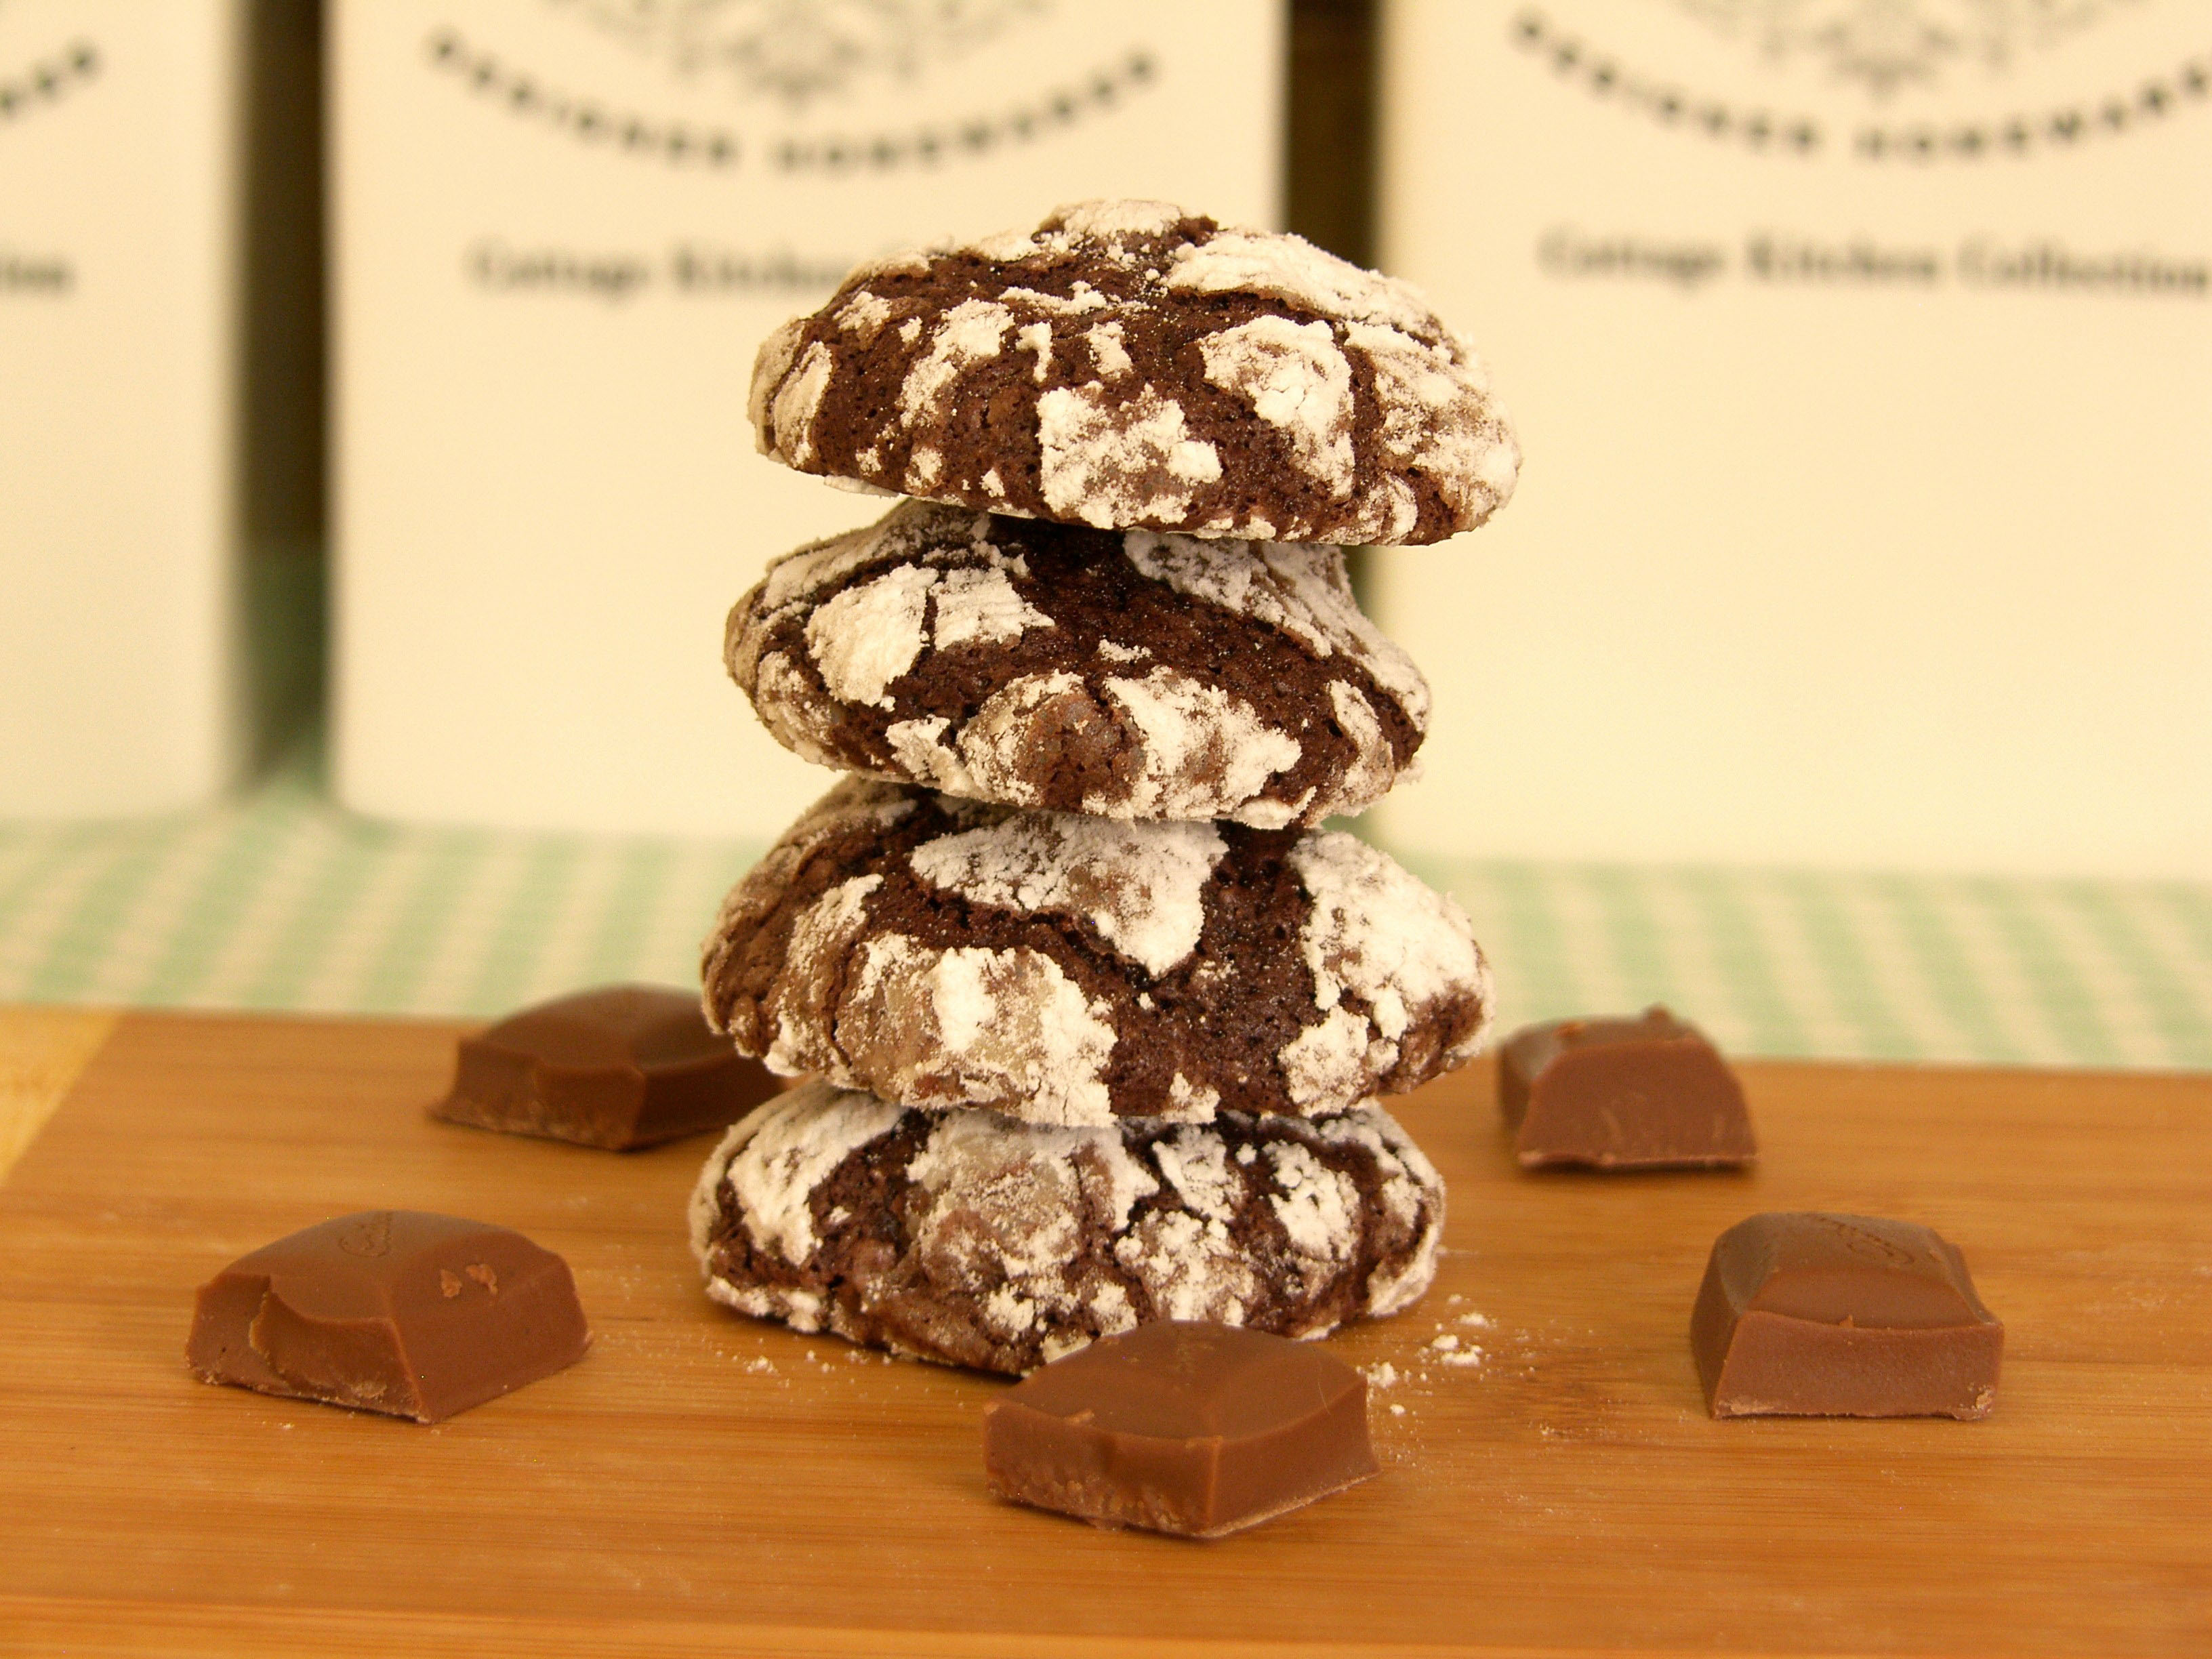
After baking in a 180°C oven for 10 min, you’ll end up with these little beauties!

SAMSUNG DIGITAL CAMERA

Little bites of happiness just waiting to be wolfed down!

SAMSUNG DIGITAL CAMERA

I really hope you enjoy these yummy chocolate truffle cookies. They are absolute bliss!

Death by Chocolate Truffle Cookies

  • Servings: 15
  • Difficulty: Easy
  • Print

SAMSUNG DIGITAL CAMERA

Ingredients:

  • 80g plain flour
  • 25g cocoa powder
  • 1/2 tsp baking powder
  • 90g caster sugar
  • 25g salted butter, cubed
  • 1 large egg
  • 10ml Frangelico (hazelnut liqueur)
  • 100g chocolate, chopped
  • 50g icing sugar, to coat

Directions:

  1. Preheat the oven to 180°C and line 2 baking trays with baking paper.
  2. Sift the flour, cocoa powder and baking powder together into a large bowl.
  3. Stir in the caster sugar. Then, using your fingertips, rub the cubed butter into the dry ingredients until the mixture forms a sandy consistency.
  4. In a jug, whisk the egg and hazelnut liqueur together. Stir the liquid into the butter and dry ingredients mixture to form a soft dough.
  5. Mix in the chopped chocolate.
  6. Cover bowl with clingfilm and chill in the fridge for 30 min.
  7. Place the icing sugar in a medium sized bowl and roll dough into 3cm diameter balls. Coat in icing sugar.
  8. Place balls on lined baking tray and bake for 10 min.
  9. Allow cookies to cool completely on the trays.

Simple Supper – Ultimate Chicken Burger

Simple Supper – Ultimate Chicken Burger

  
Every second Friday night is burger night in our house (every other Friday is pizza night). I love a good burger and I love making them at home. This turned out to be my fiancé’s favorite burger so far. It’s easy to make and the whole family will love it!

Ultimate Chicken Burgers

  • Servings: 4
  • Difficulty: Easy
  • Print

  
Ingredients:

  • 4 skinless, boneless chicken breasts
  • 4 hamburger rolls
  • Lettuce
  • 4 large tomato slices
  • 4 large gherkins, sliced lengthways
  • 8 rashers bacon, cooked
  • 1 medium onion, sliced
  • 4 slices cheese
  • 4 slices pineapple
  • Burger relish
  • Burger sauce (mix 2 tbsp mayo with 1 tbsp ketchup, 1 tbsp mustard and 4 tsp gherkin juice)

Directions:

  1. Butterfly your chicken breasts and season with desired seasoning (I use some soy sauce and steak seasoning).
  2. Cook chicken breasts in preheated, oiled frying pan for about 5 min a side.
  3. Place cheese on top of chicken breasts, cover pan and allow the chicken to steam and the cheese to melt, about 3 -5 min. Remove chicken from the pan and set aside.
  4. Grill pineapple in the same pan until you get a golden color on each side.
  5. Cut burger buns in half, butter the bottom half of the bun, add lettuce, burger relish, tomato slice, pineapple and gherkins.
  6. Place cooked chicken breasts on top of gherkins, top with slices of cooked bacon.
  7. Spread burger sauce on top half of bun and add onion slices.
  8. Serve with fries or just enjoy it on its own!

    Simple Suppers – Mexican Beef Salad

    Simple Suppers – Mexican Beef Salad

    SAMSUNG DIGITAL CAMERA

    I love making hearty salads that are quick and easy to prepare (we all have those days where we really don’t feel like making anything fancy). This Mexican beef salad is quick, easy and most importantly, delicious!

    It’s made up of strips of beef, avocado, corn, tomatoes, lettuce and roasted kidney beans. Yes, you read that last bit correctly, roasted kidney beans. When you roast the beans, you end up with a crunchy, salty, beany delight. They add great texture to salads and just make life a bit more interesting. To finish this fully loaded salad off, I’ve drizzled some Sriracha mayo over and topped it with chopped spring onion. Enjoy!

    Mexican Beef Salad

    • Servings: 4
    • Difficulty: Easy
    • Print

    SAMSUNG DIGITAL CAMERA

    Ingredients:

    • 350g beef strips
    • Lettuce, washed
    • 200g cherry tomaotoes, halved
    • 1 can kidney beans (drained, rinsed and dried)
    • 1 can corn kernels (drained and rinsed)
    • 2 avocados
    • 4 spring onion, chopped
    • 1 tbsp soy sauce
    • 2 tsp steak seasoning

    Sriracha Mayo:

    • 2 tbsp mayonnaise
    • 1 tbsp sweet chili sauce
    • 1 tsp Sriracha sauce

    Directions:

    1. Preheat the oven to 180°C and lightly oil a baking tray.
    2. Drain, rinse and dry the kidney beans. Place the beans on the baking tray, lightly coat with oil and season with salt, pepper & paprika. Roast in the oven for 25 – 30 min.
    3. Halve the cherry tomatoes, drain and rinse the corn kernels, dice the avocados and chop the spring onion. Set aside.
    4. Slice the beef strips into 4 cm strips and season with the soy sauce and steak seasoning. Cook beef in a lightly oiled frying pan for about 10 min.
    5. Make the Sriracha mayo by mixing all the ingredients in a small bowl.
    6. To serve: tear lettuce into serving bowls, then add halved tomatoes, corn and diced avocados. Add roasted beans and cooked beef. Drizzle with Sriracha mayo and top with chopped spring onion.

    Vintage Posters

    Vintage Posters

    I love my small collection of vintage posters! Most of them are 1960’s reprints of original Alphonse Mucha posters (I have a slight obsession with his work and everything Art Nouveau).

    SAMSUNG DIGITAL CAMERA

    These 3 are my favorites, they proudly hang above my bed. I have 10 in total, 4 hang in my lounge and 3 others are currently unframed because I don’t have enough space for them yet 🙂

    SAMSUNG DIGITAL CAMERA

    SAMSUNG DIGITAL CAMERA

    These 2 are part of the nine 1960’s reprints which my fiance miraculously found a few years ago. Obviously I would love to find original posters, but when it comes to paper collectibles, that can be quite difficult (and incredibly expensive). I’m happy to settle for new reproductions because they add pops of color to any room.

    SAMSUNG DIGITAL CAMERA

    This is a new reproduction that I bought from eBay (really cheap) about 2 years ago. It’s my favorite Mucha poster 🙂

    These vintage (and vintage style) posters add a touch of quirkiness & character to any style interior, whether it’s ultra modern or more traditional. I’ve found some great examples of how to use these awesome pieces of art, in any room, from Houzz (I love this App). Hopefully I can give you some inspiration to add 1 or 2 posters to your own home!

    Love the use of different sized posters on this wall display.

    The posters add some vibrant color to a white & cream bedroom!

    Looking super chic in a modern style living room.

    Perfect look for a contemporary staircase wall display.

    Adding some quirkiness to a shabby chic interior.

    Adding some awesome character to sleek, modern interiors!


    Chocolate Cupcakes with Marshmallow Frosting

    Chocolate Cupcakes with Marshmallow Frosting

    Chocolate Cupcakes

    Moist, gooey chocolate cupcakes smothered in feather light marshmallow frosting. Absolute heaven!

    As I get older, I’ve found that I can’t quite handle super sweet buttercream anymore (the exact same buttercream that I used to adore when I was a kid). I find myself craving a more balanced cupcake-to-frosting sugar ratio and this recipe delivers just that. The cupcake packs a rich chocolate punch and the frosting is a lovely, subtle addition that doesn’t overwhelm your sweet tooth!

    These chocolate cupcakes are easy to make and always come out perfect.

    SAMSUNG DIGITAL CAMERA

    The heart of these chocolate cupcakes is the melted butter, water, cocoa and oil mix.

    SAMSUNG DIGITAL CAMERA

    The cupcake batter is quite runny and it can get a bit messy when you fill your cupcake cases.

    SAMSUNG DIGITAL CAMERA

    After about 15 min in the oven, the cupcakes are perfectly puffed up.

    The marshmallow fluff is quick and delicious (I just end up eating it straight out of the mixer).

    SAMSUNG DIGITAL CAMERA

    The first step in the 2 step process to make marshmallow fluff is to whisk all your ingredients in a bain marie (bowl over a pot of simmering hot water), until they are white and fluffy. You then transfer the mixture to a stand mixer and let it go for 10 min!

    I decided to amp up the chocolate flavor by decorating these bad boys with grated chocolate, but they would be equally as good topped with nuts, sprinkles or just more marshmallow fluff!

    SAMSUNG DIGITAL CAMERA

    SAMSUNG DIGITAL CAMERA

    Chocolate Cupcakes with Marshmallow Frosting

    • Servings: 12
    • Difficulty: Easy
    • Print

    Chocolate Cupcakes

    Ingredients:

    Chocolate Cupcakes:

    • 250ml self-raising flour
    • 250ml sugar
    • 2.5ml baking powder
    • Pinch of salt
    • 62.5g butter
    • 125ml water
    • 1/4 cup cocoa
    • 1/4 cup oil
    • 1 large egg
    • 1/4 cup buttermilk

    Marshmallow Frosting:

    • 3 large egg whites
    • 150g caster sugar
    • 2 tbsp golden syrup
    • Pinch of salt
    • 1 tsp vanilla extract

    Directions:

    1. Preheat the oven to 180°C and line a 12 hole muffin pan with cupcake cases.
    2. Heat butter, water, cocoa and oil in a small saucepan, over medium heat until everything is melted and starts to boil. Remove from the heat and cool for 10 min.
    3. Meanwhile, sift the flour, sugar, baking powder and salt into a large bowl.
    4. Mix the buttermilk and egg in a jug.
    5. Add the chocolate mixture to the dry ingredients and stir well.
    6. Add the buttermilk mixture to the chocolate mix and stir until it’s well-combined.
    7. Pour the batter into the prepared pan and bake for about 15 min.
    8. Remove from oven and cool, in the pan, for 1 hour.

    To make the frosting:

    1. Put all of the ingredients into a bowl over a pot of simmering water.
    2. Beat with an electric hand mixer until all of the ingredients combine and the mixture becomes white and thickened.
    3. Transfer the mixture to the bowl of a stand mixer and whip on high for 10 min, until it becomes fluffy and doubles in size.

    Assembly:

    1. Once your cupcakes have cooled, fill a piping bag with your marshmallow frosting and pipe swirls onto each of your cupcakes.
    2. Top with grated chocolate, nuts or sprinkles.


    Simple Supper – Bacon and Pea Pasta

    Simple Supper – Bacon and Pea Pasta

    This is the first short post in a weekly “Simple Supper” recipe segment that I’ll be doing. All the recipes will be easy to make and budget friendly (Bonus!).

    img_0299

    This bacon & pea pasta recipe is so simple and delicious that it’s become a firm family favorite in my home. It only takes about 30 min to make and you end up with a light pasta dish that’s comforting & filling! Check out the recipe below 🙂

    Simple Bacon and Pea Pasta

    • Servings: 4
    • Difficulty: Easy
    • Print

    img_0299

    Ingredients:

    • 350 – 400g pasta (I used Penne)
    • 200g streaky bacon, cooked
    • 1 cup frozen peas
    • Half an onion, chopped
    • 100ml white wine
    • 2 tbsp butter
    • 1 clove garlic, crushed
    • 125g cream cheese
    • 1/2 cup grated Parmesan cheese
    • Salt, pepper & paprika, to taste

    Directions:

    1. Cook pasta in boiling water, until al dente, about 15 mins.
    2. Drain pasta and reserve 4 tbsp of the pasta water.
    3. Cook bacon until crispy (I cook it in the microwave, on high, 4-5 pieces at a time for about 30 sec – 1 min per piece, but you can cook it anyway you like).
    4. While your bacon is cooking, melt butter in a large frying pan, over medium heat.
    5. Add peas, onion and garlic to butter and cook for 5 mins.
    6. Add wine and saute for an additional 5 mins.
    7. Add cream cheese and stir until melted.
    8. Season your sauce with salt, pepper and paprika, to taste.
    9. Add your reserved pasta water and pasta to your sauce and toss until coated.
    10. Serve, topped with grated Parmesan.